Halloween DIY Craft: Trick or Treat Basket

Some of the links in my blogs may be affiliate links. See my disclaimer page for more information.
In this Halloween DIY craft project, we will be making a small Bat basket. This basket can be used to put treats in for a party favor or for a small child to use for trick or treating. You can even go a little larger with the materials for a bigger basket if you wish. Either way the kids will definitely love this fun activity! This is a good family or school bonding craft project and at the same time, they get to explore their creativity while enjoying it!
I have created a whole Free Easy Halloween DIY Craft Guide you that you can download and make a number of crafts including this one. Check out the link below.
Trick-or-treat has been customary to children in many countries all over the globe during the holiday season. The children are dressed in costumes and they ask for treats house to house. The children knock on the doors and greet you with – “trick or treat!!!,” in return, the homeowner should give a treat to the kids. Normal treats include candies, chocolates or small gift or money.
If your neighborhood is not the place to do this there may be a couple other alternatives in your area. Check for churches that are hosting a nearby trunk-or-treat. Sometimes these events are combined with games and food. The kids will go around to trunks of cars instead of doors. You may also find your local mall hosting a store trick-or-treat event as well.
Aside from the costumes, children need a treat pouch or basket that they can use in treat-or-treating. This is where they will place the candies, chocolates, etc. that they can collect during the said event. A personalized Halloween basket is cool and at the same time builds the creativity of the child.
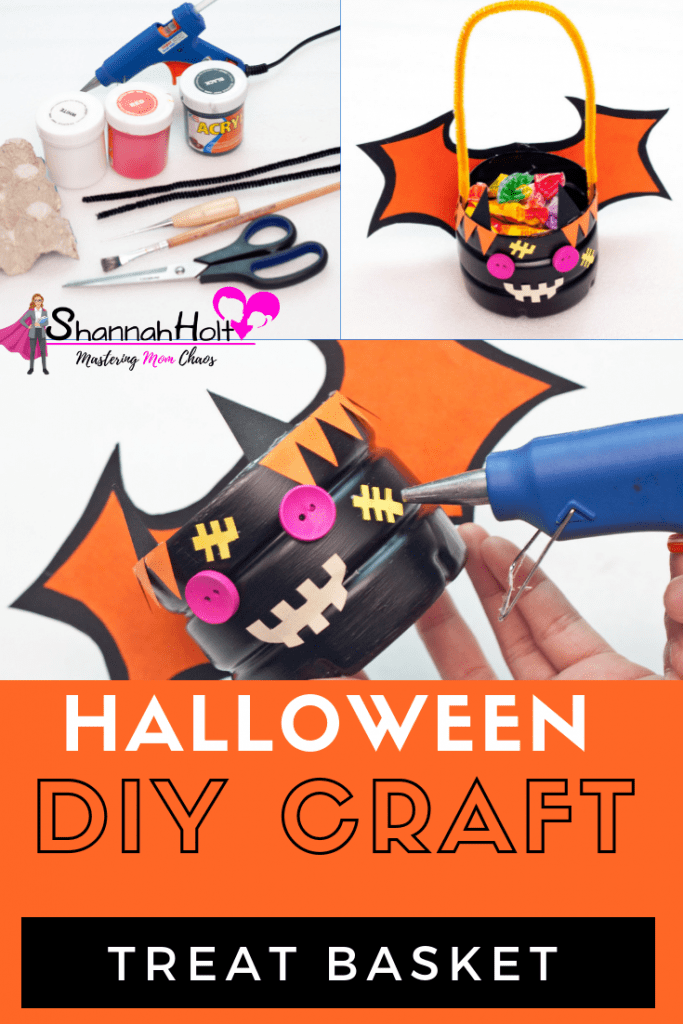
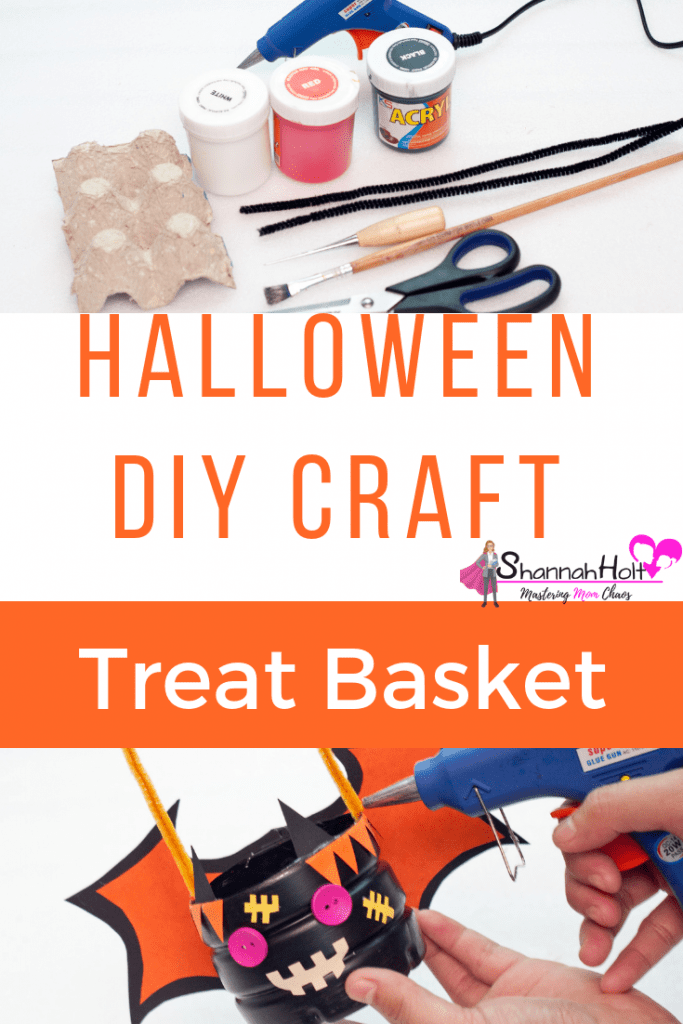
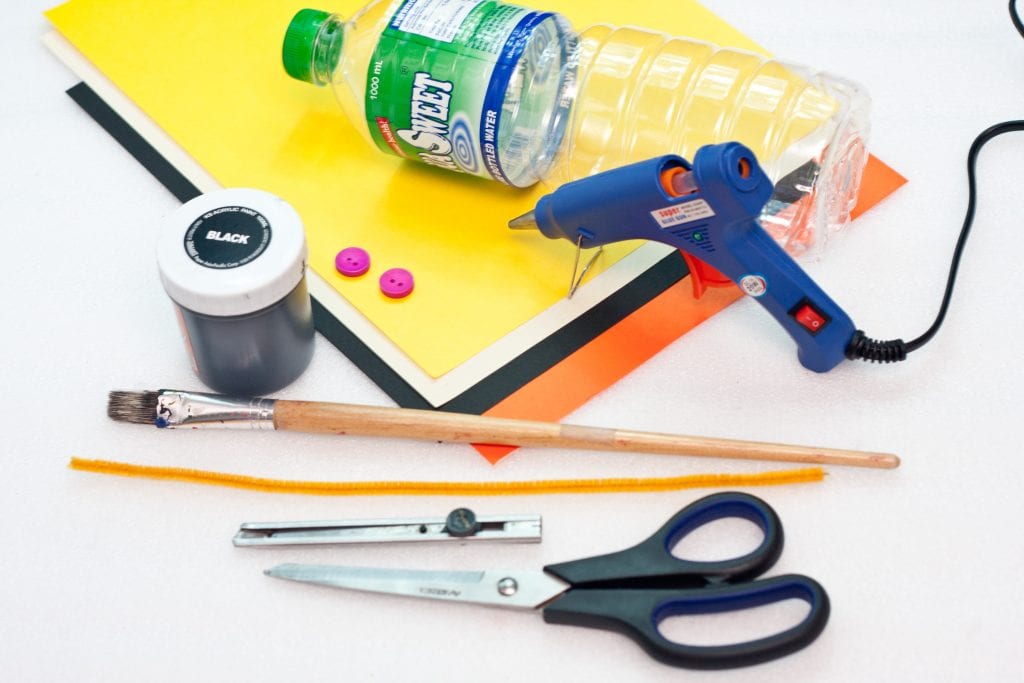
Gather all these materials for this Halloween DIY Craft: Trick or Treat Basket
• an empty 1L water bottle (You could also make this bigger with a 2-liter bottle)
• 2 pcs. medium wooden buttons
• construction paper/board (yellow, orange, black and white)
• a piece of orange pipe cleaner
• X-ACTO #2 Knife
• black acrylic paint
• a pair of scissors
• hot glue gun with glue sticks
• paintbrush (included with the paint set linked above)
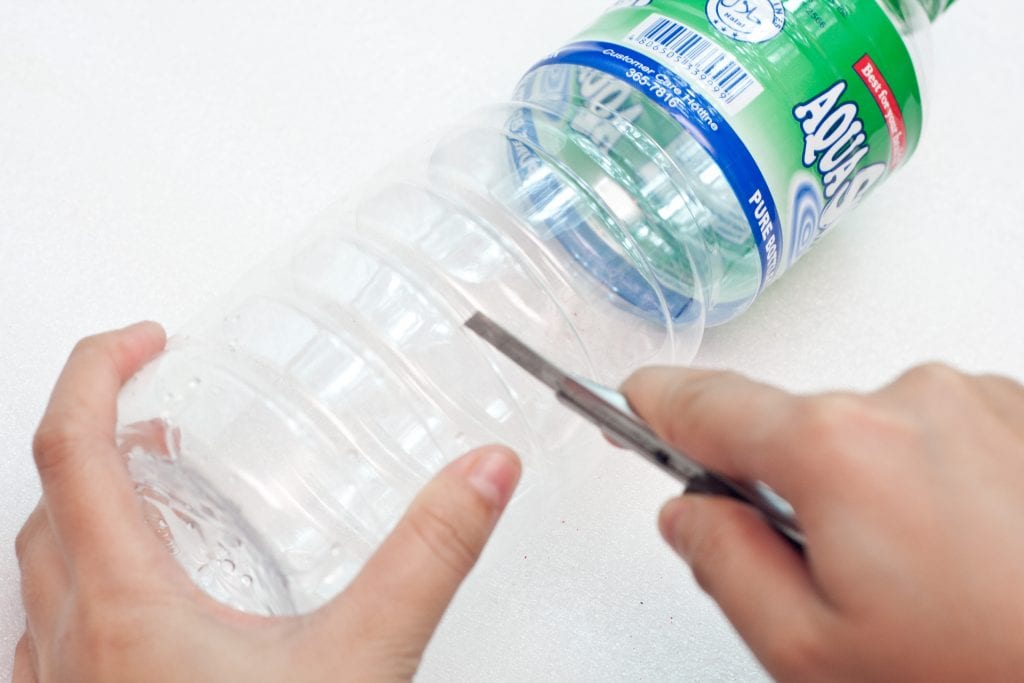
Step 1:
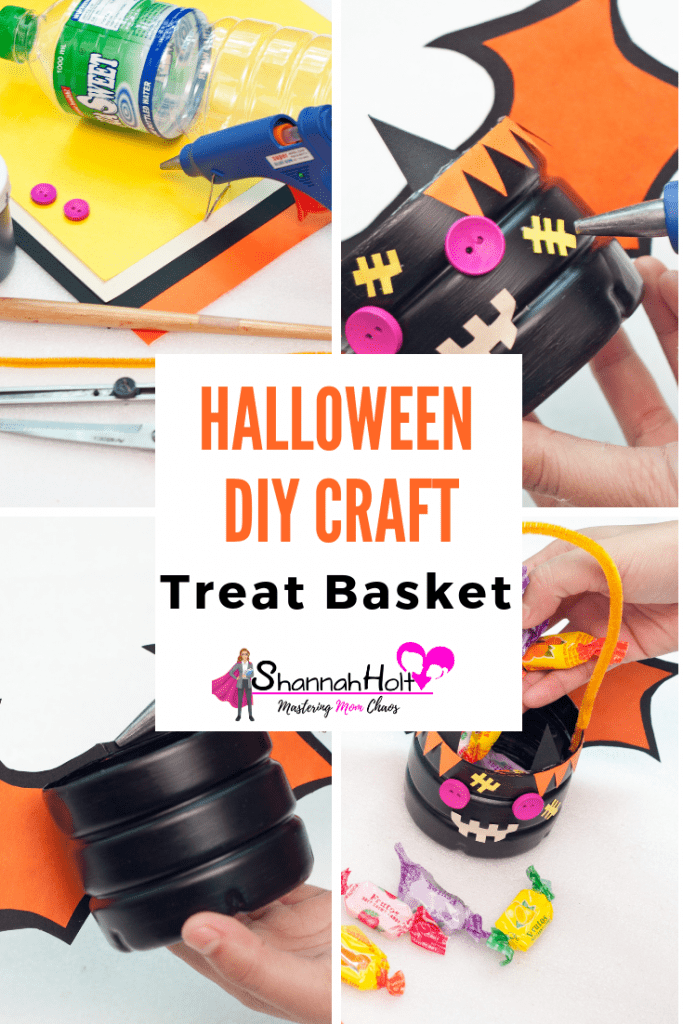
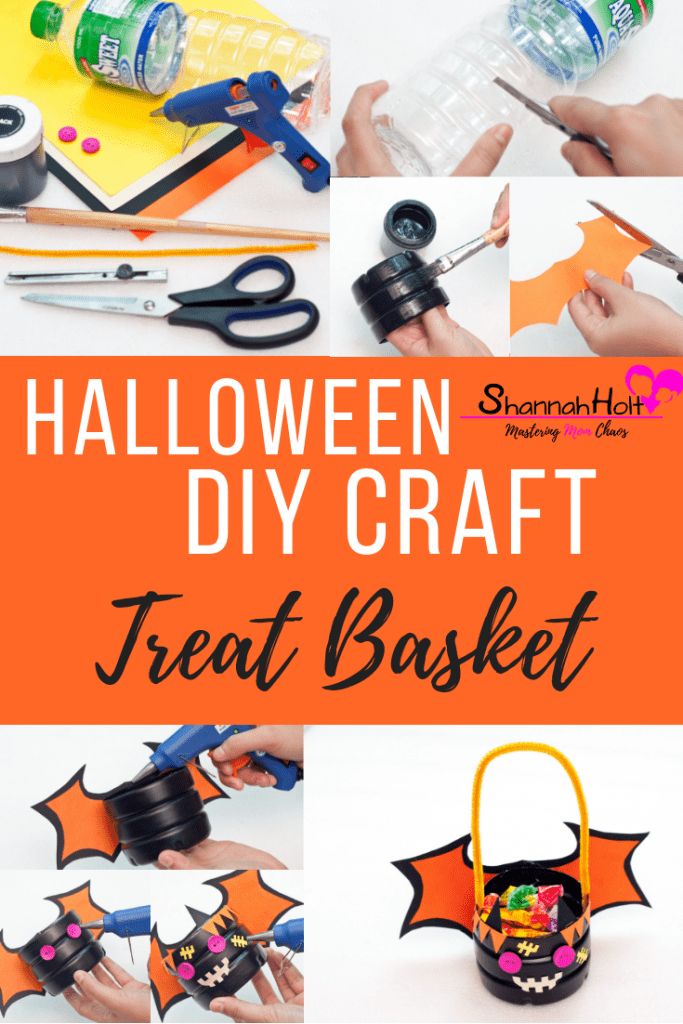
Cut the lower part of the water bottle. The height should be at least 1/3 the total height of the water bottle. Ask guidance to your parents or older sister or brother if you are not old enough to handle sharp materials. Disregard the upper part of the bottle afterward. The lower part of the bottle will serve as the main body of the trick-or-treat basket.
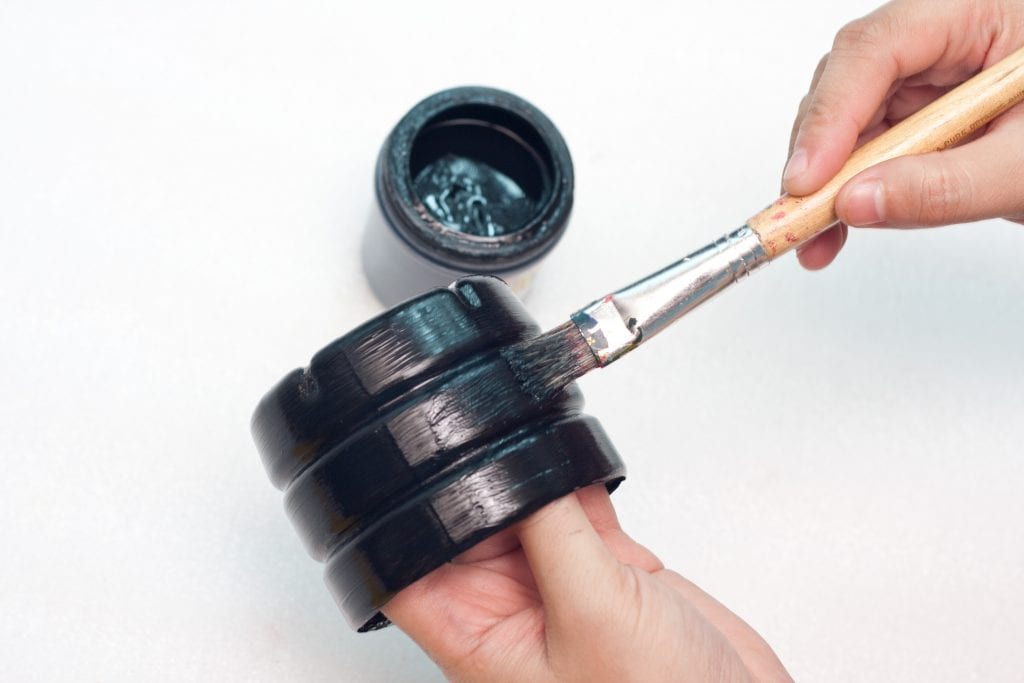
Step 2:
Paint the outer body of the water bottle bottom. Let it dry for an hour. Maintain one-direction stroke in brushing the paint all over the body since this will create uniformity on the walls of it.
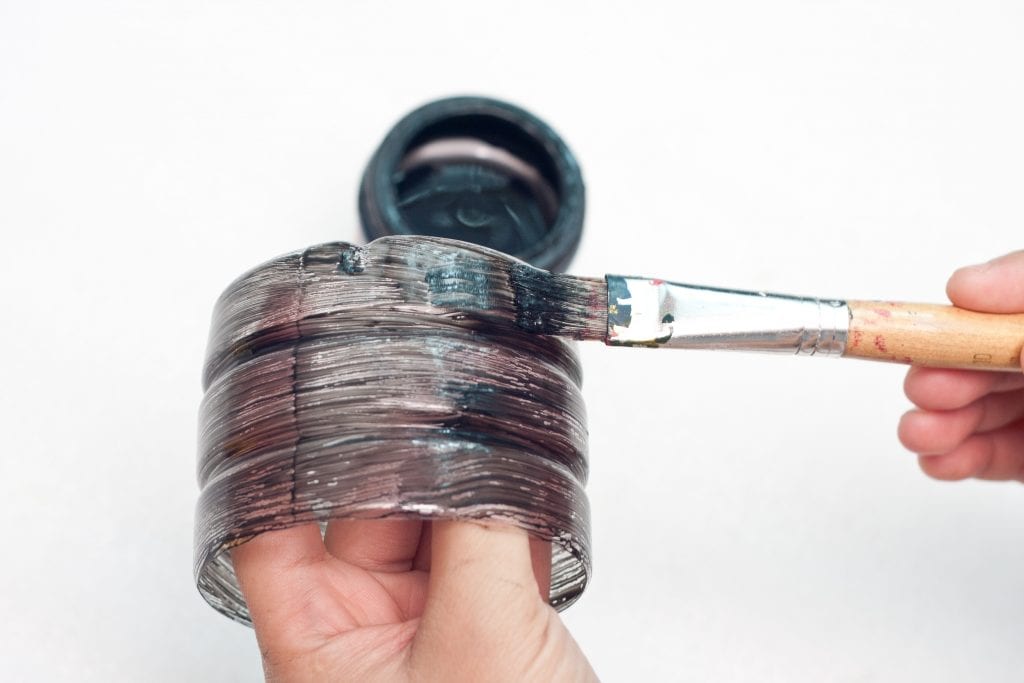
Step 3:
Paint the second coating on the wall of the water bottle bottom. If you are still not satisfied with the outcome, a third coating is suggested on this. Let the paint dry for an hour or two.
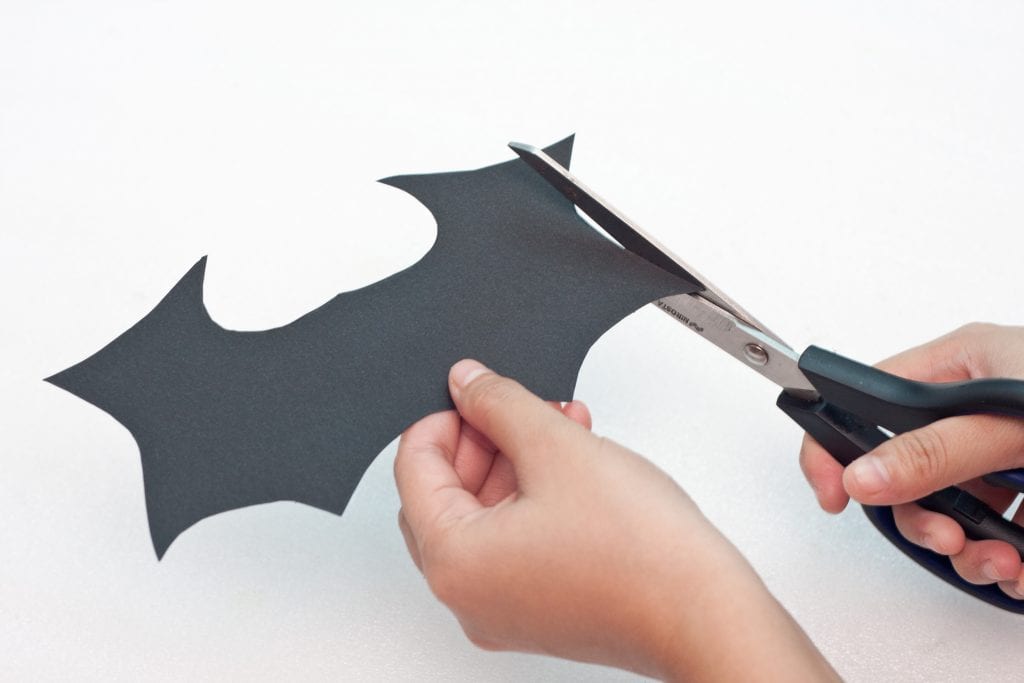
Step 4:
Draw and cut a bat wing on a piece of black construction paper.
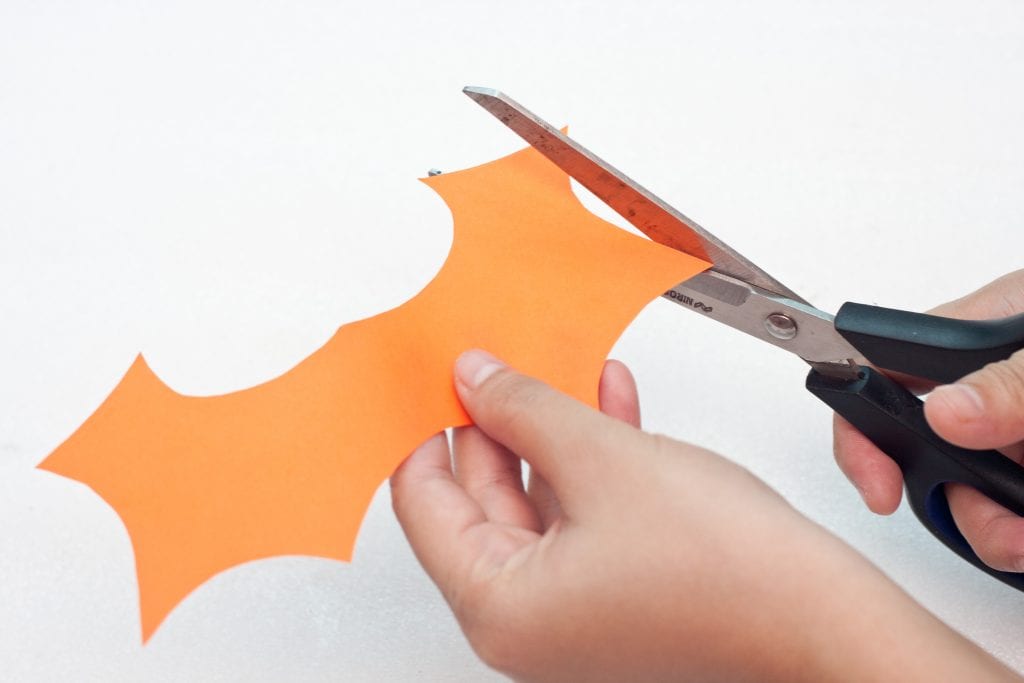
Step 5:
Draw and cut a smaller version of the black bat wing from an orange construction paper.
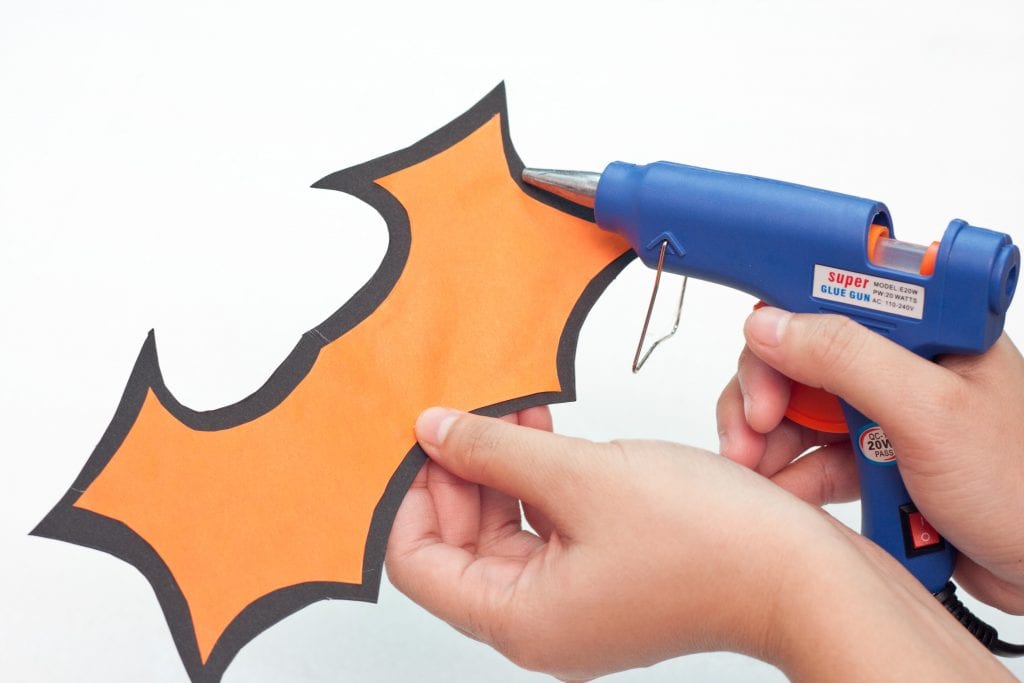
Step 6:
Place the smaller orange bat wing on top of the black bat wing. Make sure to place the smaller wing on the middle part of the bigger one. Hot glue the wings together.
No time? Download my Free Easy Halloween DIY Craft Guide and have all the crafts in one place. Check out the link below.
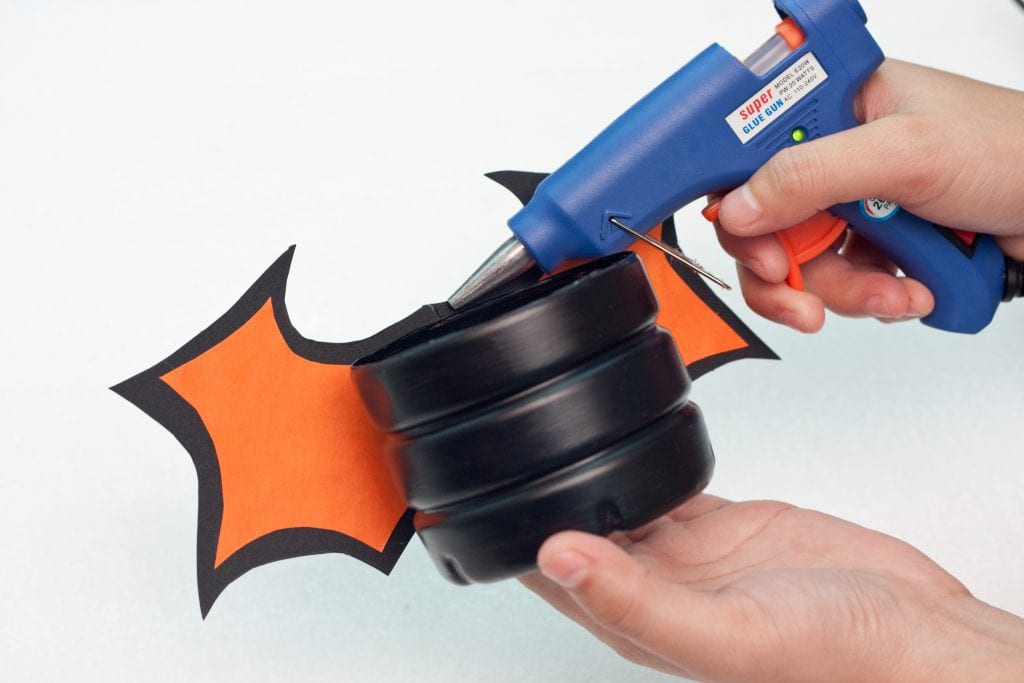
Step 7:
Hot glue the bat wings on the basket body. Take note that the orange part of the wing should be the one touching the external wall of the plastic body of the basket. Align the wings properly on the body to create an outstanding overall effect.
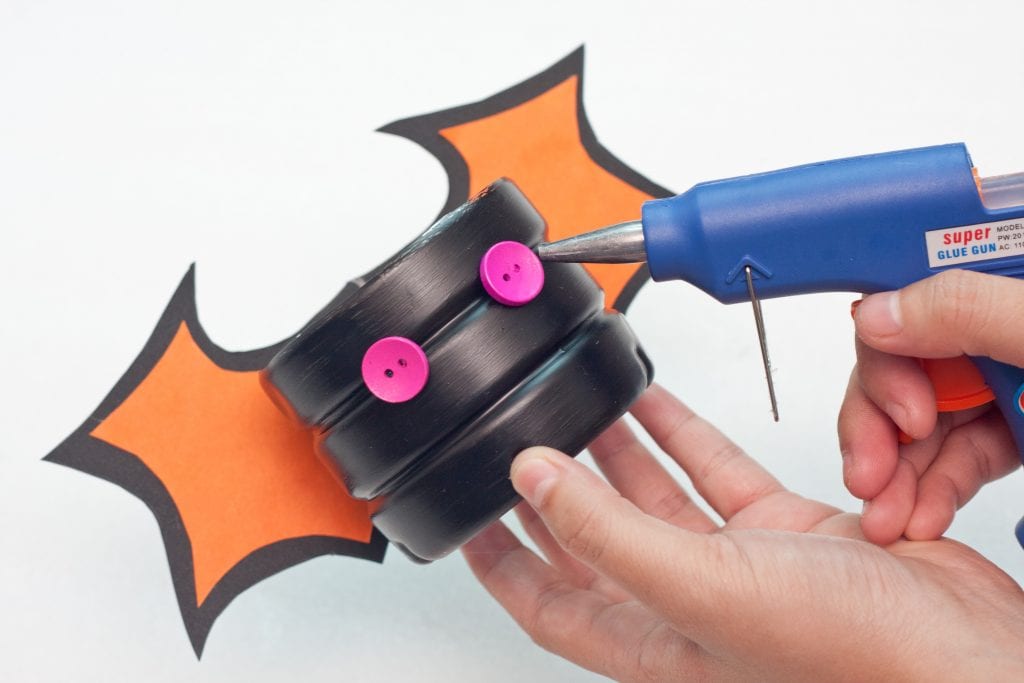
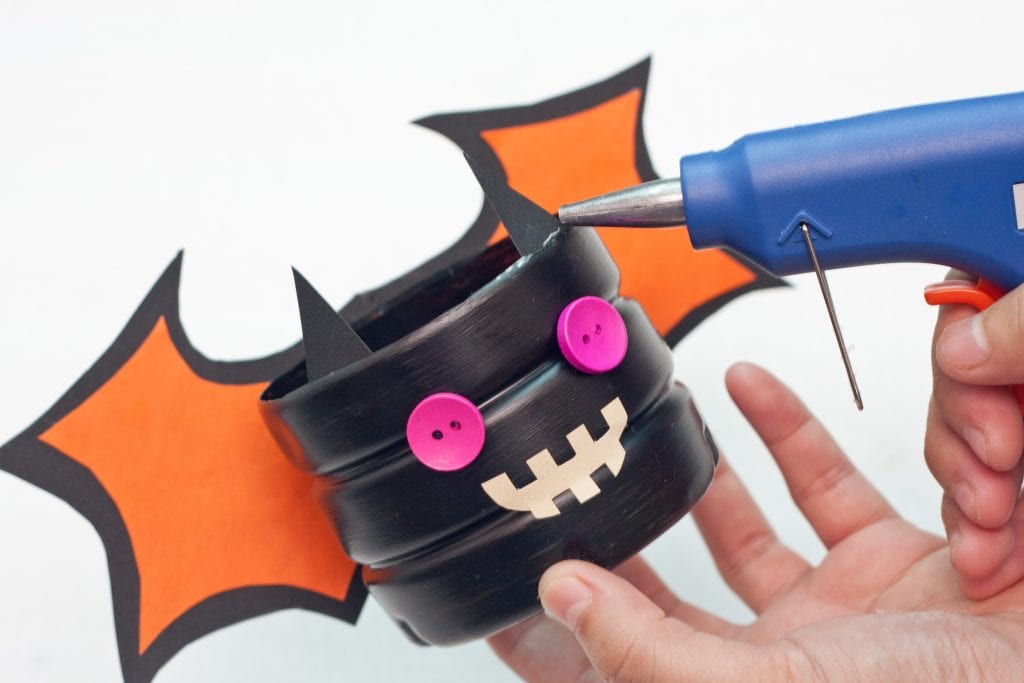
Step 8:
Hot glue the wooden buttons on the upper part of the basket body opposite to the bat wings. The buttons will serve as the eyes of the character in the basket.
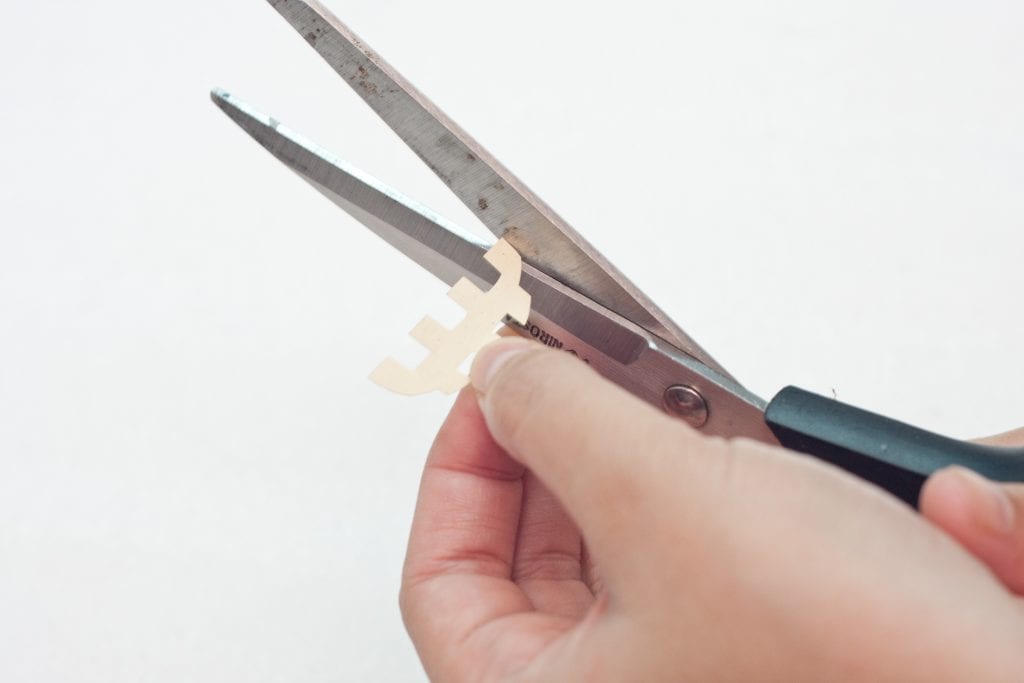
Step 9:
Cut an alternating zigzagged mouth from the white or cream construction paper. This will be the mouth of the character in the basket.
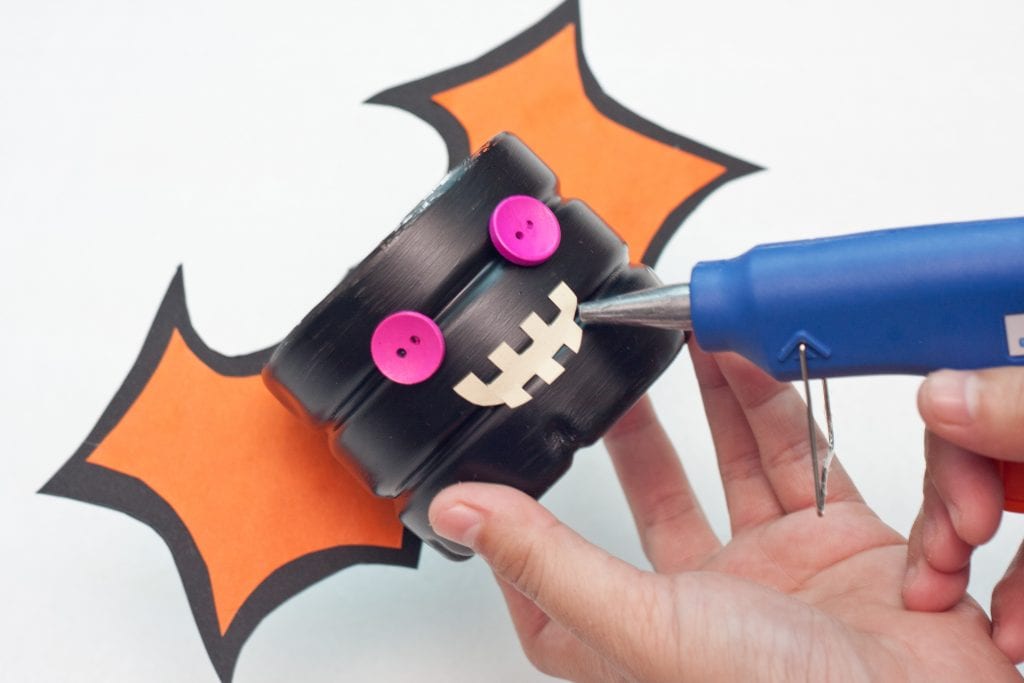
Step 10:
Hot glue the mouth of the character just below the eyes.
Step 11:
Cut a pair of horns from the black construction paper.
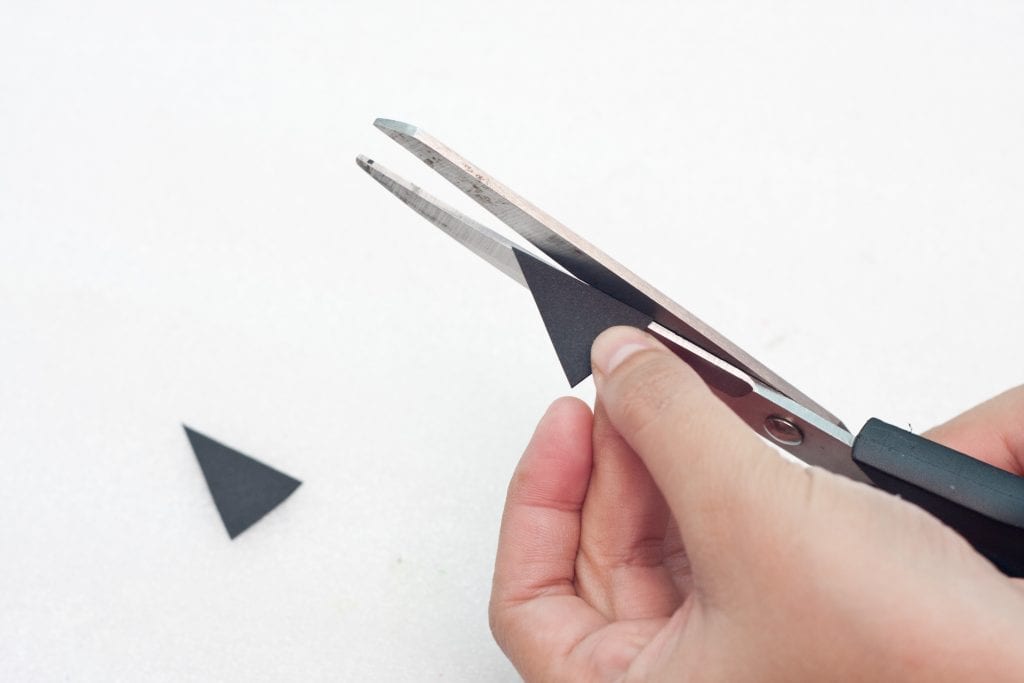
Step 12:
Add the horns on the topmost part of the basket, slightly parallel to the eyes of the character. Secure the horns on top using hot glue.
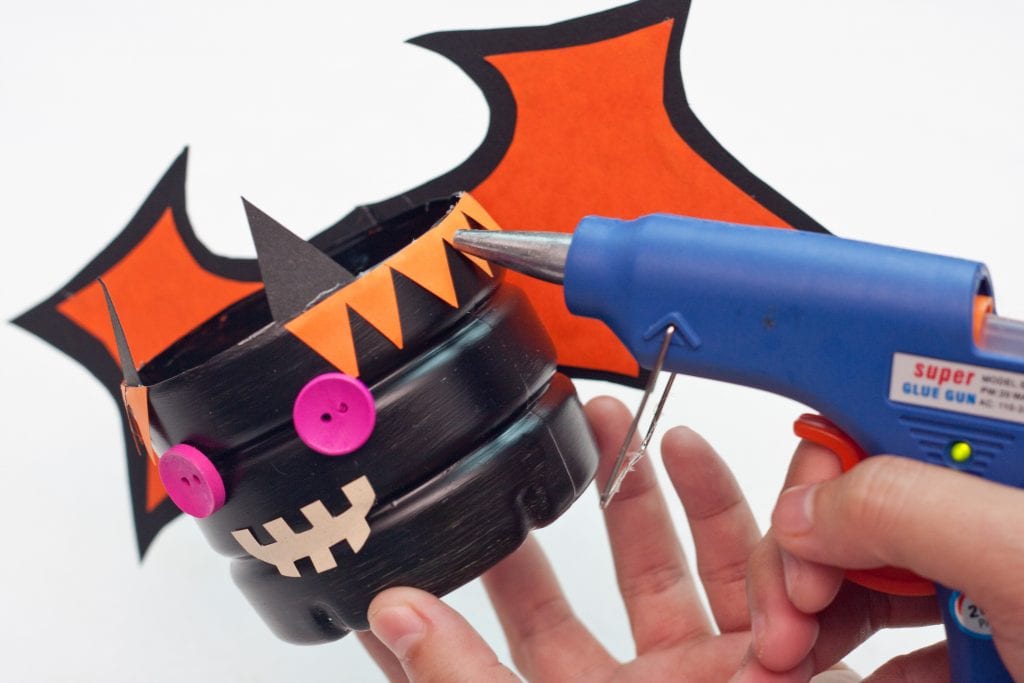
Step 13:
Cut small pieces of triangles from the orange construction paper. This will be used as decors on the top edge of the basket. Hot glue the orange triangles around the top edge afterwards.
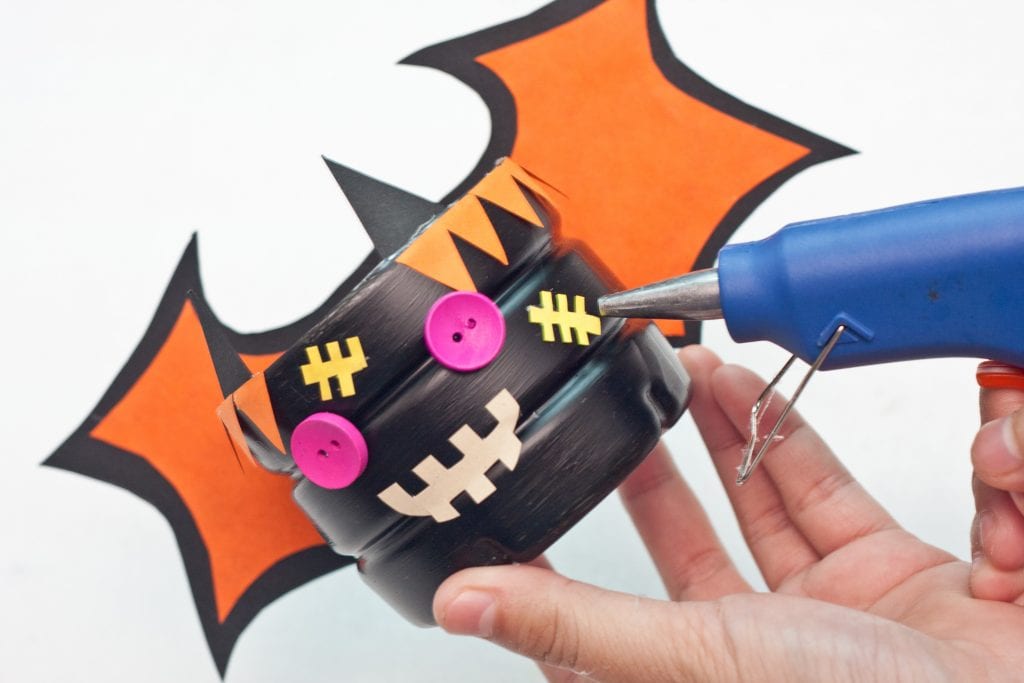
Step 14:
Cut several pieces of stitch-shaped objects in a yellow construction paper. Randomly glue the cut-outs on the face of the Halloween character.
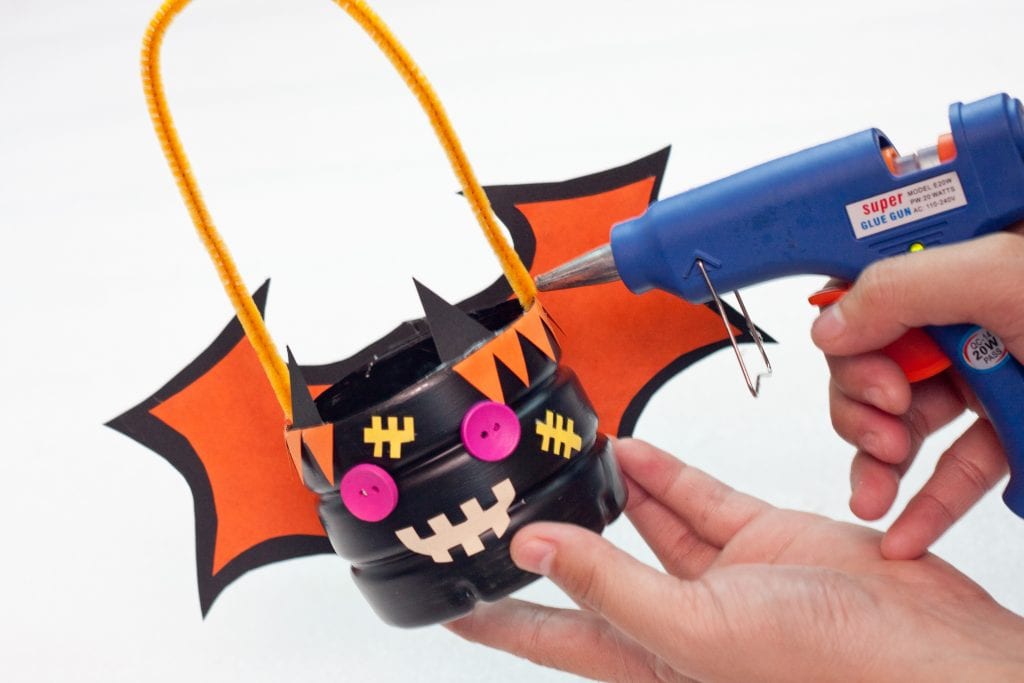
Step 15:
Generously glue the handle of the basket on the plastic body of it.
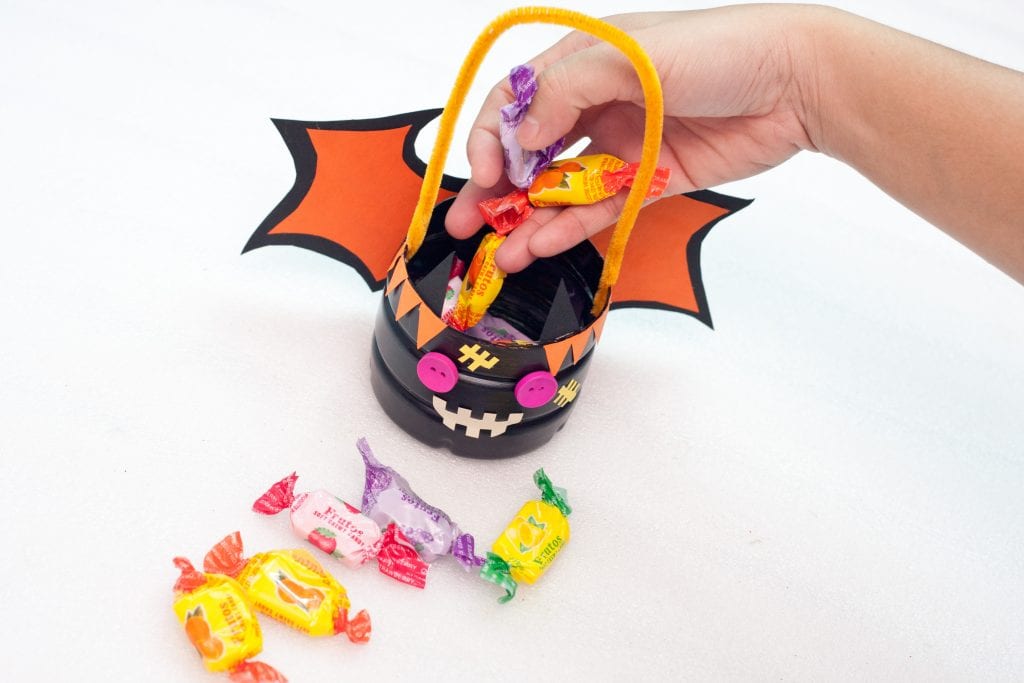
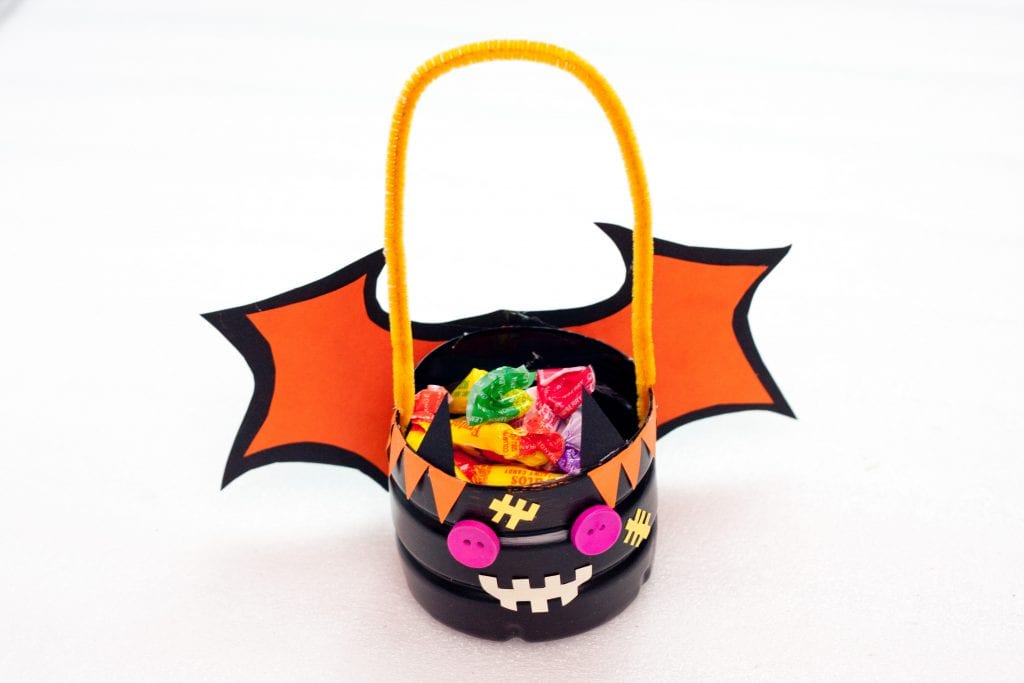
Step 16:
Finally done and ready to pass out as party favors or for trick or treating! You can now use your Halloween basket and collect several treats and sweets! If used for trick or treating you may want to carry around the bigger bucket for them to dump this one into as they go door to door or trunk to trunk.
This Halloween trick-or-treat basket can also complete your Halloween costume. You not only have a basket, but you also have a cute Halloween character with you! You will definitely capture the attention of other people and they would give you the best treats ever! Let’s start trick-or-treating with friends and have fun!
Save this DIY and more with my Free Easy Halloween DIY Craft Guide today. Check out the link below.